
Pictured below is one of my favorite structures and one of the simplest. It's a porthole, ready for whatever image calls to be placed underneath. Here, because Spring is in the air, a cheerful catbird. In this case I have complemented the porthole with a scatter of smaller punched holes. Those holes may get covered up down the line, but for now I like the contrast against the whiteness of the old paper of the trail of darkness.

More about porthole construction later. For now, a window, which is just about as easy to make as it sounds. First you draw the outline of your window on your page. Then you hog out the waste.

In my window, there are a couple of complications in the hogging-out-the-waste part. First, because I want to sandwich an image in between, I am actually cutting two windows, through two book pages. Second, as explained in the previous installment, each new book page is glued up of two or three original book pages. Which equals thickness. Which would be fine if I owned a steel rule, but I do not. For me, it's red plastic all the way, and cutting against a plastic ruler with a sharp edge tool makes a seasick line no matter how steady your hand. I get around this by making an X in the center and cutting out to my pencil lines from here.

The result is a cool shape, and if I had worked more carefully, I might have been able to incorporte it into my book. I slipped a bird underneath to get an idea of future potential. Not going to work this time. But there's always a next time.

This is the completed window construction.

An image (for example, this transparency of a house), would go in between the cut pages like so. The reason that I use this sandwich method is because the back of the window will now look as finished as the front. Of course you could also use a single window and then deal with the edges of the image on the back side. I find those edges intrusive and so these days I most usually go with the sandwich method.
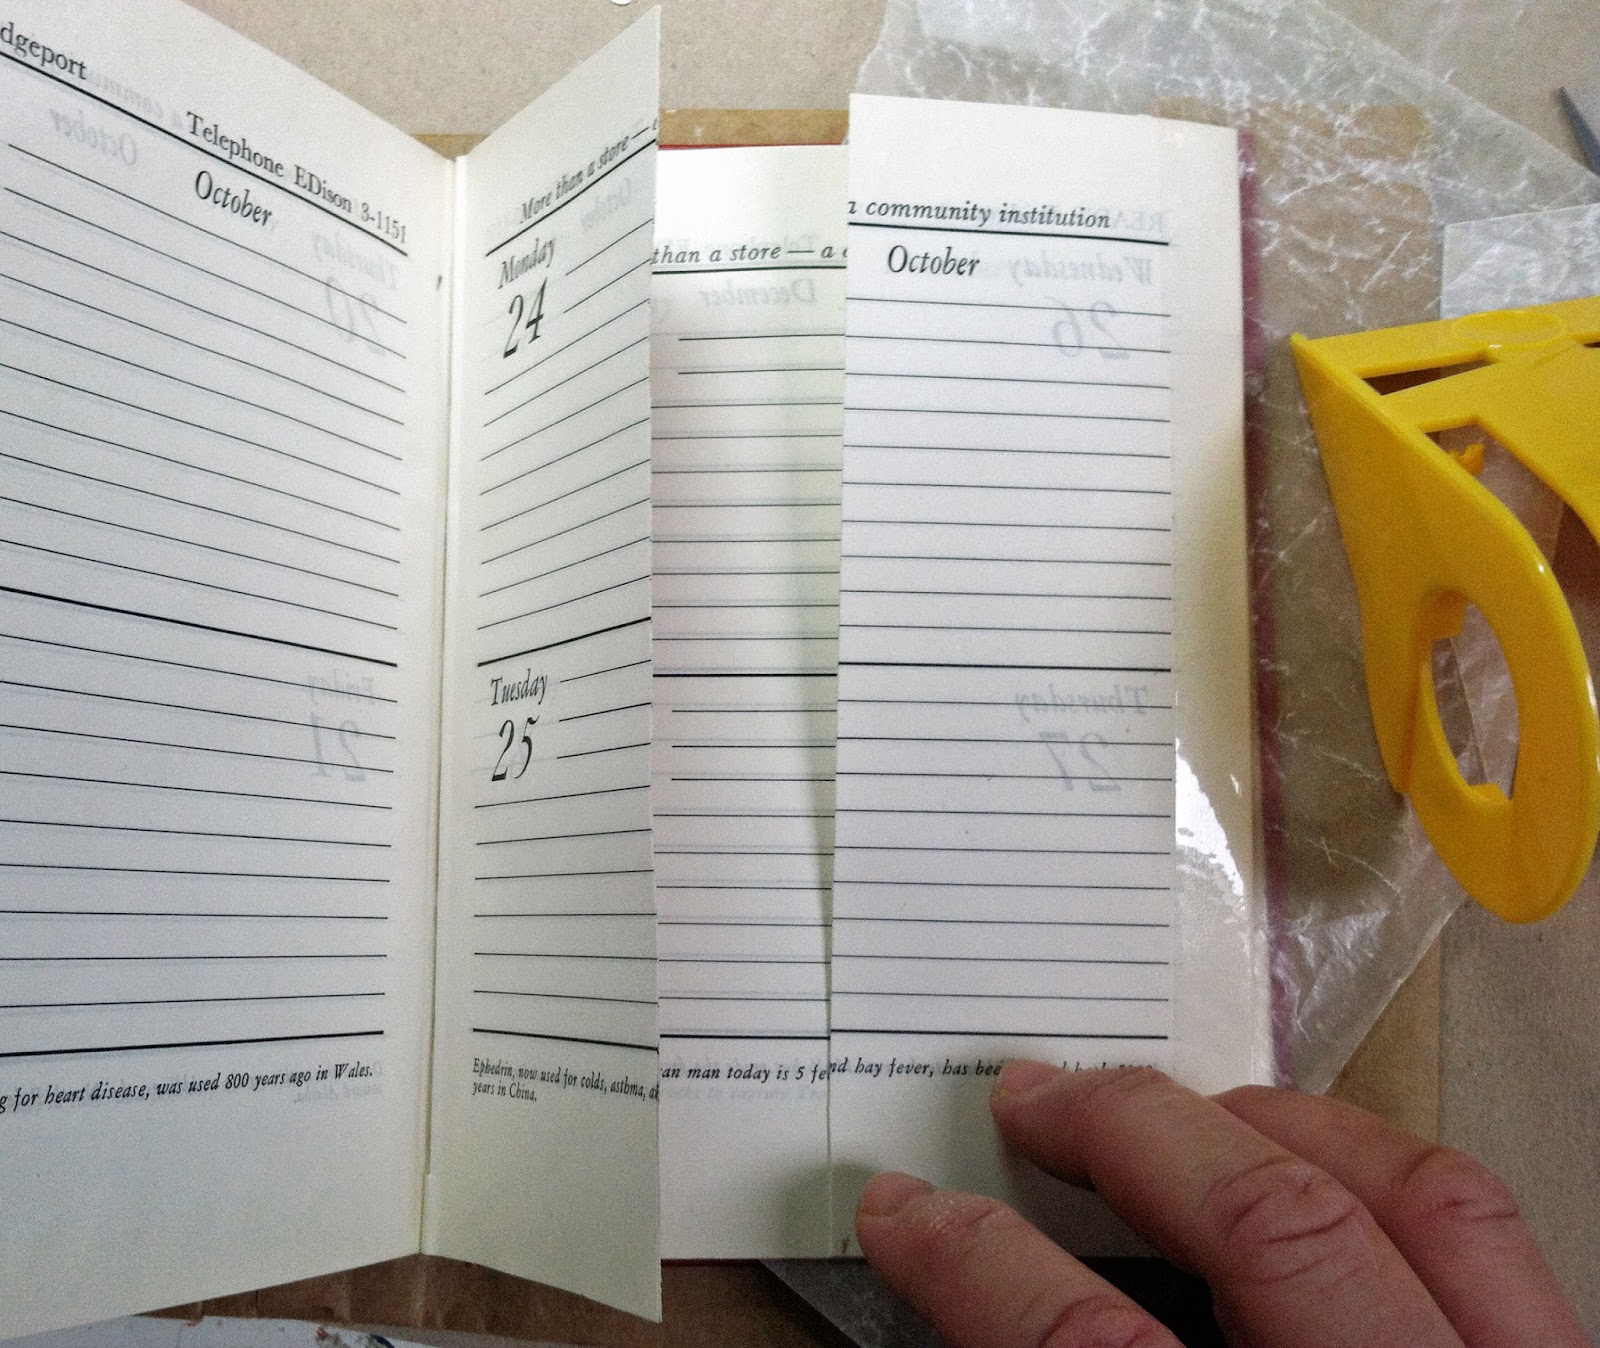
Which brings me to the trifold. Oh, I love the trifold! It gives you a third more space upon which to collage. It's also an excellent use of paper. Remember those spreads so carefully removed in the previous phase? Some of that paper was interesting and here is a way to get it back into the book by gluing the right page of one spread onto the left page of the other. Nothing could be more straightforward.

The seam on the left will have to be reinforced, of course, but that will happen later. This is how the trifold looks when it is glued in place. Imagine the far left page folding down, and you will see that you have also created the possibility for lift-up interaction. Nice.

Onward to flaps. I have a decent vintage postcard collection and its denizens tend to clamor to be included in my altered books. They can do so as flaps that hinge either from the side or from the top. The mechanism in both is the same--both are glued in place with a strip of clear packing tape. If the flap hinges from the side, however, it is called a "tip-in," for those who are, as I am, into the naming of things. I tried out the postcard shown below as a tip-in, but it didn't jive with my vision of where this book was going, so I decided to go for a lift-up flap instead.

In addition to my everyday postcard collection, I am fortunate to possess four BOXES (yes! boxes!) of nature flashcards published by the National Audubon Society in 1970. The catbird below comes from the "50 Winter Birds" card pack.

By attaching my bird card to the top edge of the book with a strip of packing tape, I have easily created a lift-up flap.

To create the porthole through which to see the catbird, I returned to the previous page and punched out a hole with a round craft punch. When doing such work, I have found it imperative to measure twice and cut once. When a cut is complete, it's done, and although you could shift the alignment, for example, of this lift-up flap, messing around with a packing-tape hinge is never kind to the paper underneath.

For good measure, I then proceeded to add a scatter of smaller holes on the page, which you can see if you scroll back up to the picture at the very top. You can see, on the left page of the spread shown below, what the porthole looks like from the back. And then, just because I could, I punched out another porthole under the flap. I slipped the Madonna postcard underneath the porthole for a quick visual and realized immediately that I would rue the impulse that drove me to succumb to the Urge To Make More Holes.

Here is why. What you're seeing through the porthole is the back of the catbird card. Punching in that second hole left me with an awkward thing happening on the left edge between the catbird card and the porthole. I can tell that finding integrity here is going to make me crazy.

The last structure I've added today is a fold-out door. Again, it's nothing tricky. The long description is "you cut a page in half." The short description is "you cut a page in half." I used a small paper cutter for this because I wanted a sharp, defined line.

After you've cut the page in two, attach the unattached piece to the outer edge of the following page with packing tape. And, presto, you have a door.
Next up: Finding a home for the pages I wanted to save from my poor bombed Barcelona book. I realize that not everybody is lucky enough to have a bombed Barcelona book lurking about, but the kind of incorporations I'll be doing will illustrate a good way to add a second structural round to your altered book when your design demands it.
Looking forward to seeing you next time, and if you are following along and making books, I'd appreciate a look. I'll even figure out a gallery....
'Till then.
----
Following along in sequence? Enjoy Part 3 of the saga here: http://lauratringaliholmes.blogspot.com/2013/03/dont-get-jittery-on-me-part-3-or-im.html

7 comments:
I'm enjoying these book altering posts Laura!
Thanks, ZenziB. I'm really glad you're liking 'em!
Loving these altered book tutorials. The book is going to be amazing. And four BOXES of those flash cards? I can't stand it...
Thanks so much for showing how to do this.....
Delighted to have something to share, PASF, though today's work was full of Oops Moments, which of course I recorded as lessons on what NOT to do. And those boxes of flash cards? On the free shelf in the library! Score!
This stuff looks sooo cool! I’m very impressed with your patience. But the way you’ve explained it makes it seem much less daunting. You look like you’re having so much fun that I it makes me want to play too!
By the by, have you ever used “Yes!” brand glue?
I just ordered some and have been gathering info about adhesives in general. ANy thoughts?
Many thanks, Kanchan! The thing I especially love about altered bookmaking is how the story builds little bit by little bit. So it's easy to pick up and put down. I've never used Yes Glue...I work with a safe-for-photos gluestick when doing work that needs to remain flat and double-sided photo-safe tape when there is any risk of the moisture in the glue stick corrupting a fragile page. Where moisture isn't a problem, I typically stick with the gel mediums because I like their sealant properties. So far I haven't used any gel in this book because I'm not willing to take the chance of warping the paper.
You have shared a great information about Flap Hinge and Lift Off Hinge.Which are very informative for us.Thanks
Post a Comment